创建LED调光器
通过串口发送数据来调节LED的亮度
此示例演示如何将数据从个人计算机发送到 Arduino 板以控制 LED 的亮度。数据以单独的字节形式发送,每个字节的值范围为 0 到 255。该程序读取这些字节并使用它们来设置 LED 的亮度。
硬件要求
- Arduino板卡
- LED
- 220欧电阻
电路
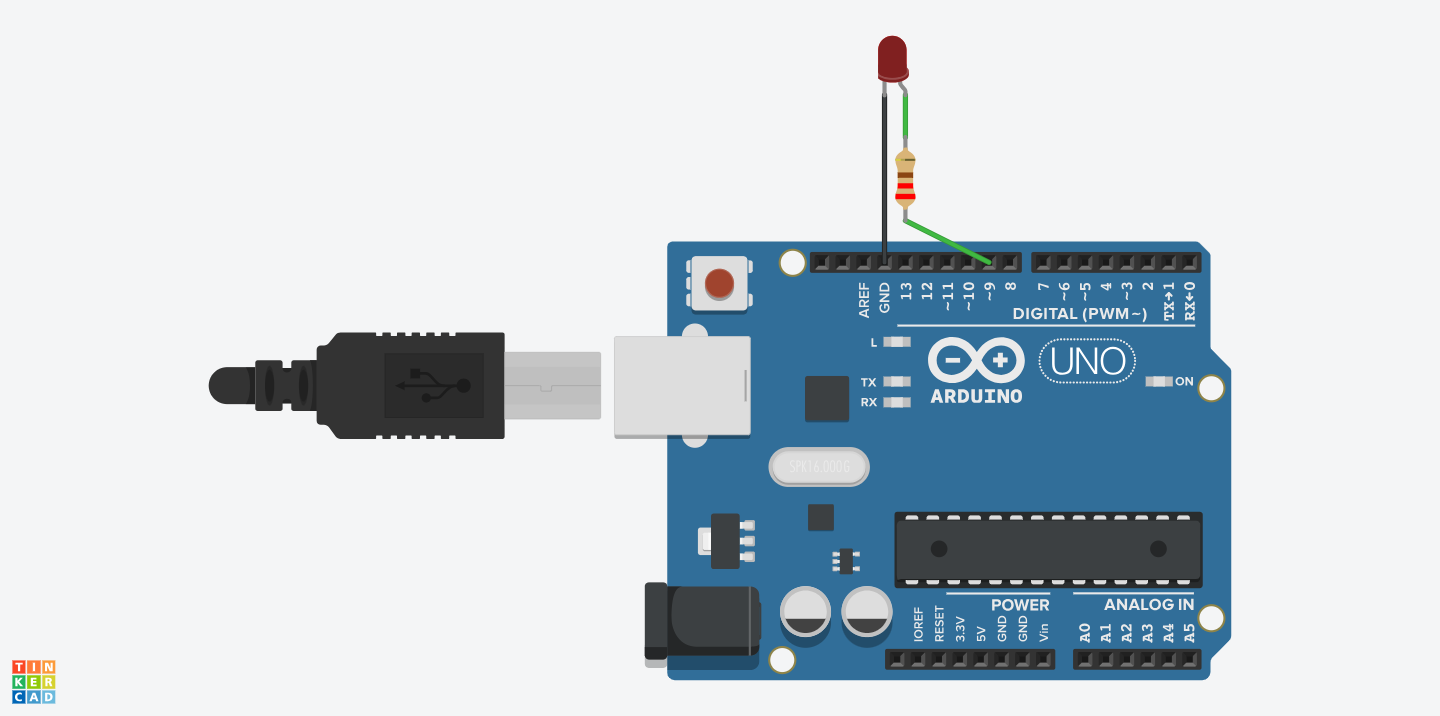
将220欧姆限流电阻连接到数字引脚9,并串联一个LED。 LED 的长正引脚(阳极)应连接到电阻器的输出,而较短的负引脚(阴极)应接地。
电路图

代码
编译并运行示例
cargo build
cargo run
使用VS Code的串行监视器,并使用十六进制或者二进制格式发送一个字节的数据。
完整代码如下:
src/main.rs
/*!
 * Dimmer
 *
 * Demonstrates sending data from the computer to the Arduino board, in this case
 * to control the brightness of an LED. The data is sent in individual bytes,
 *
 * each of which ranges from 0 to 255. Arduino reads these bytes and uses them to
 * set the brightness of the LED.
 */
#![no_std]
#![no_main]

use arduino_hal::{
    default_serial,
    simple_pwm::{IntoPwmPin, Prescaler, Timer1Pwm},
};
use panic_halt as _;

#[arduino_hal::entry]
fn main() -> ! {
    let dp = arduino_hal::Peripherals::take().unwrap();
    let pins = arduino_hal::pins!(dp);
    let mut serial = default_serial!(dp, pins, 57600);

    let mut pwm_led = pins
        .d9
        .into_output()
        .into_pwm(&Timer1Pwm::new(dp.TC1, Prescaler::Prescale64));
    pwm_led.enable();

    loop {
        pwm_led.set_duty(serial.read_byte());
    }
}